Step 1: Brainstorm
The first step in this process is to brainstorm ideas for what product you want to make this could be coasters, key chains, stickers, etc. From there you will then start to brainstorm the design you want to create. A good way of doing this is by drawing a couple of different sketches of your designs and getting feedback on them. Finally, you’re going to brainstorm about what material you’re going to use, which is different for each product. For example, if you choose to make coasters you have the option between wood and acrylic. Once you have completed finished brainstorming you can move on to the next step.
Step 2: Creating Your Design on Adobe Illustrator
The second step in this process is going to be creating a digital copy of your designs. In this section, I’m going to explain how to do this step with Adobe Illustrator but if you have a different software, you like better you can use that. To begin
- Download Adobe Illustrator to your computer
- Open Illustrator, click new file and choose the size of your document
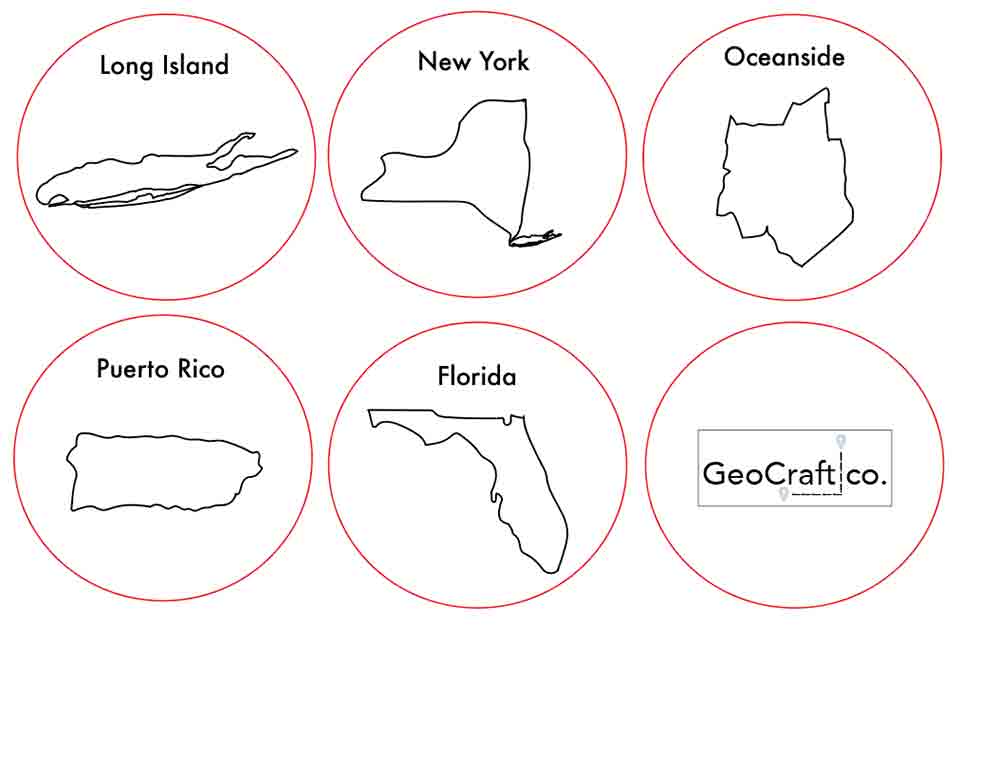
- Start sketching your designs with either the pen or paintbrush tool.
From here the process can be different depending on the product you are making. I’m going to explain the rest of the process for anyone making coasters.
- Once you are happy with your design you are going to create the shape you want your coasters to be. They should be between _____ and ______
- Then you are going to resize your design to fit inside your shape. MAKE SURE IT IS CENTERED!
- This next step is optional but if you want to add text to your coaster now is the time. Pick out the font and size of your text and
- Finally, you are going to change the color of your design based on what you want fully cut out and what you just want engraved.
- FULLY CUT items are going to be placed in RED
- ENGRAVED items are going to be left in BLACK
Once you have completed all of these steps of creating your design in Illustrator you are able to move on to the next step.
Step 3: Exporting Your Document
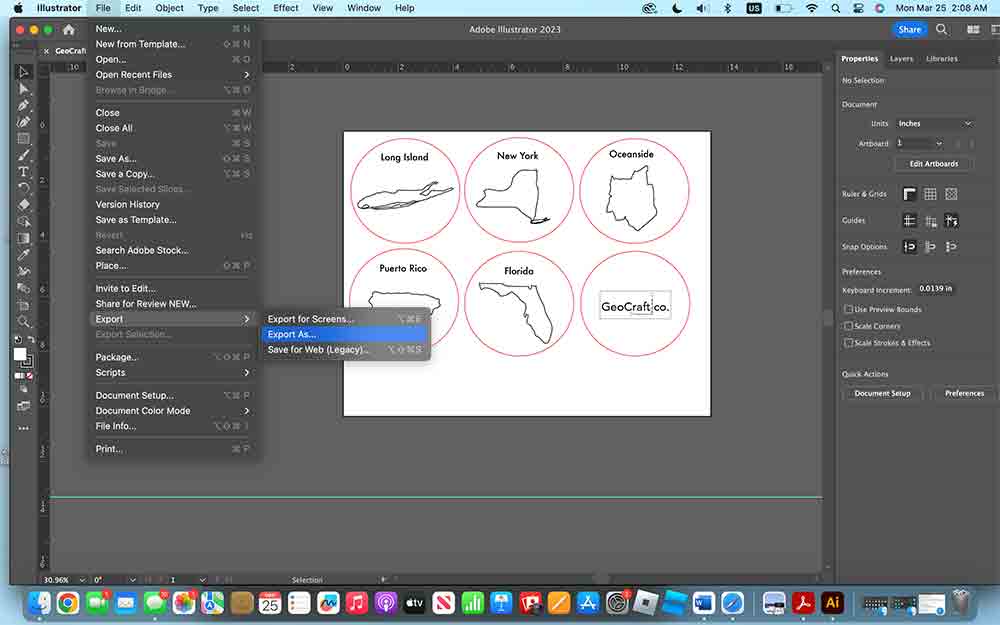
Congratulations on finishing your digital design! Now I’m going to go over how to export your file and how to set up the laser cut machine.
- Go to file, export, and click on export as …
- Name your document, and do your company name with design at the end. So, for my I did Geocraftcodesigns.
- Click export and put it on your desktop
- Next email yourself the document
Step 4: Setting Up Your Laser Cutter
This step is going to take place wherever your laser cutter is.
- Log on to the computer and your email
- Open up your email and place your document onto the desktop so it’s easy to access
- Place your document into whatever software your laser cutter uses. Here you’re going to fix all the little details to make sure your designs come out perfect.
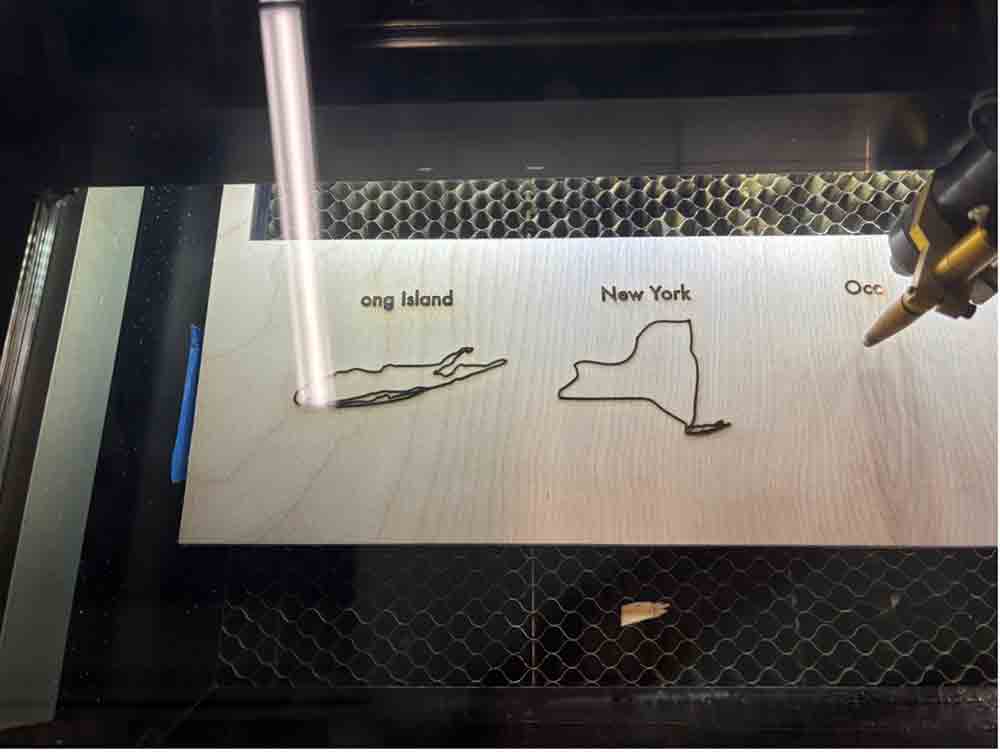
- Next, you’re going to place the wood into the laser cutter, autofocus it, and see where the laser is going to cut
Once you have all that set up you can start the project. DO NOT LEAVE THE MACHINE
Step 5: Finished Product
- First, we’re going to add a seal on top to make it waterproof. Follow the instructions on the seal you’re using.
- After that dries, we are going to add some cork to the bottom of each coaster so that they won’t slip
- YOU FINISHED!
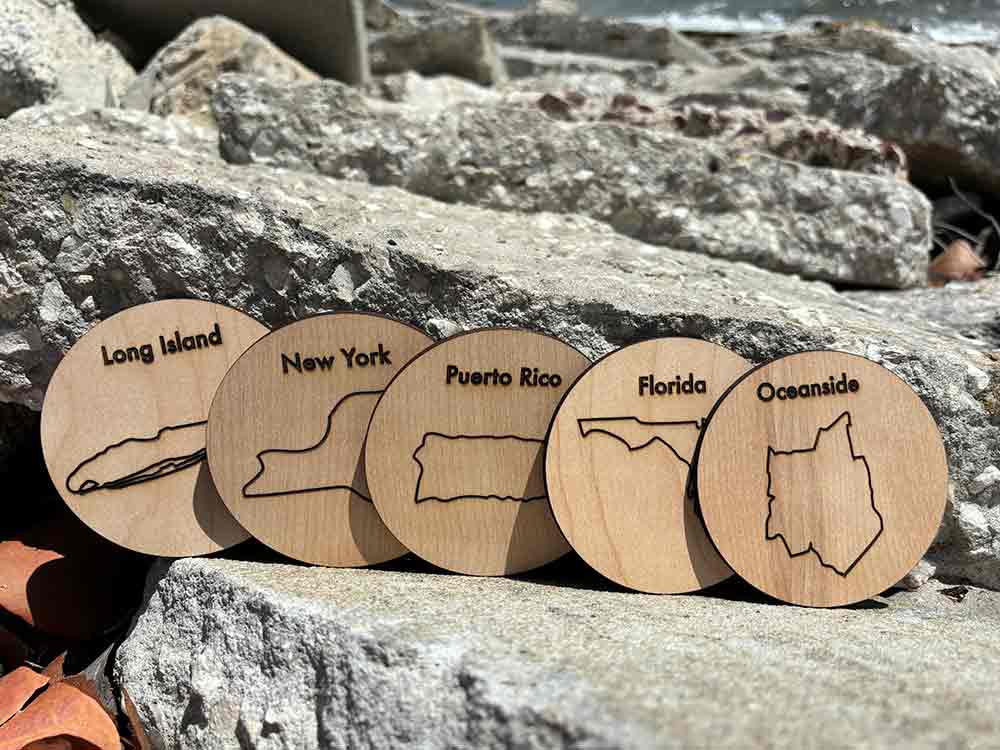
YAY! You finished making your coasters using a laser cutter. Now if you just made them for yourself finished. But if you want to sell them it’s time to make your own personal website. I hope this tutorial/process was fun and easy to do. If you have any questions or comments, please reach out to us and will get back to you as soon as we can!